


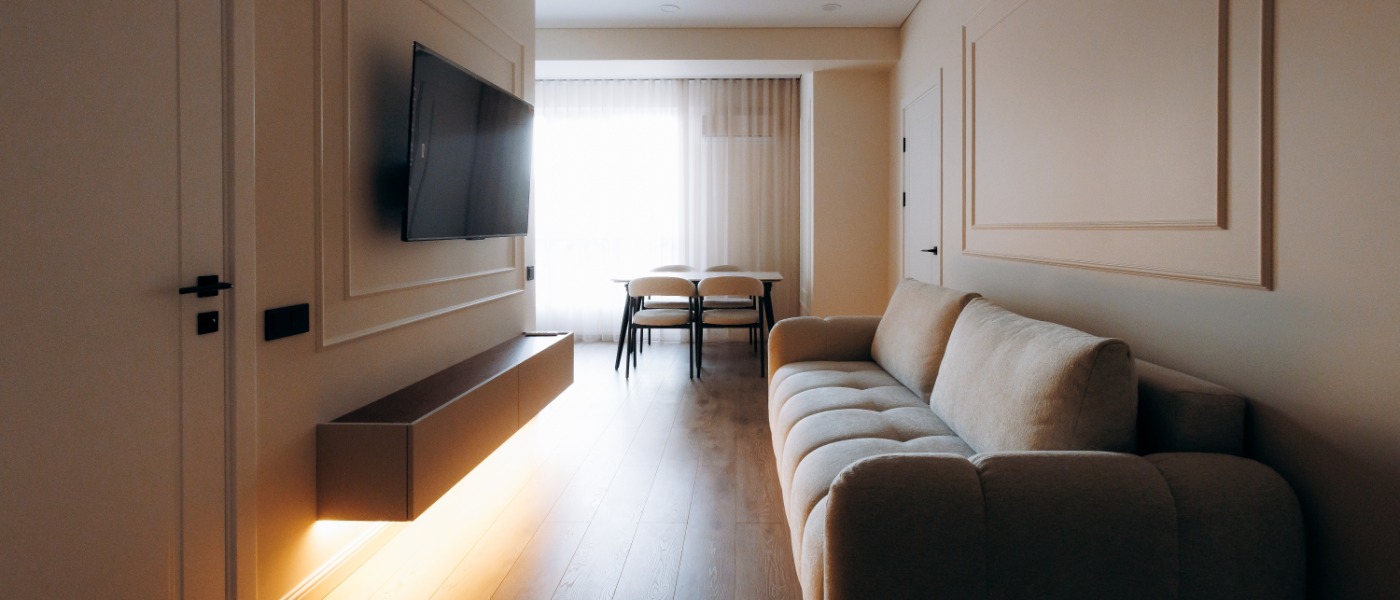
Give your living room a serious style upgrade without sacrificing valuable floor space.
Dude, your TV deserves better than a bulky entertainment center taking over your living room. A floating console adds a sleek, modern look while giving you space to store your entertainment gear without crowding the floor.
Before you grab your tools, however, there are a few things to know to build a floating TV console that looks sharp and lasts over time. From choosing the right proportions to figuring out how everything attaches to your wall, a little preparation can save you from expensive mistakes and unnecessary frustration.
1. Your Wall Needs To Handle the Weight
A floating TV console might look like it’s defying gravity, but nothing is magical about keeping it securely attached to your wall. The mounting hardware and wall structure do the heavy lifting, so make proper installation your priority.
Before getting excited about that sleek, wall-mounted look, figure out what kind of wall you’re working with. Wood studs, metal studs, and masonry walls require different mounting methods, and drywall alone cannot support a heavy cabinet.
Use a stud finder to locate framing members, and verify their positions before drilling. If you live in an apartment with metal studs or unusual wall construction, consult a qualified installer about suitable mounting hardware.
You’ll also need to account for everything the console will hold. Your cabinet’s weight matters, but your gaming console, speakers, and other equipment increase the load.
Check the manufacturer’s weight ratings for your mounting system, including any requirements concerning fastener placement. A floating cabinet that starts pulling away from the wall won’t impress anyone, bro.
2. Getting the Dimensions Right Makes a Huge Difference
Nothing throws off a living room faster than awkwardly proportioned furniture. A floating TV console should complement your television without overwhelming the wall beneath it.
Start by measuring your TV’s actual width rather than relying on its advertised screen size. Television manufacturers measure screens diagonally, so a 65-inch TV isn’t 65 inches wide.
For a balanced appearance, consider making your console slightly wider than your television. You can adjust those proportions depending on your wall space and the overall design you’re aiming for.
Measure Before You Build
Grab a tape measure and work through these considerations:
- Console width: Leave enough visual breathing room around your television.
- Cabinet depth: Accommodate your entertainment equipment without creating an oversized cabinet.
- Mounting height: Position the console where you can access everything comfortably.
- Floor clearance: Leave enough room underneath for cleaning and a visually lighter appearance.
Smaller apartments often benefit from shallower cabinetry, especially when the living room doubles as a dining area. You don’t want your new console sticking out into an already narrow walkway.
Use painter’s tape to outline the proposed dimensions on your wall. Seeing the actual footprint helps you adjust before cutting expensive materials.
3. Your Material Choice Affects the Finished Look
You don’t need exotic hardwood to create a floating console that looks expensive. The right material and finish often matter more than spending a fortune on lumber.
Plywood makes a strong candidate for cabinet construction because its layered structure provides dimensional stability. Furniture-grade plywood also comes in attractive wood veneers that can give your project a refined appearance.
Medium-density fiberboard (MDF) offers a smooth surface for painted cabinets, but its weight and moisture sensitivity warrant consideration. Solid wood brings natural character, but seasonal movement requires thoughtful construction.
If you’re chasing a modern aesthetic, consider these combinations:
- Natural oak veneer: Creates a warm, understated look that works with contemporary furniture.
- Matte black cabinetry: Adds contrast against lighter walls without demanding much attention.
- Walnut veneer: Brings richer color and a sophisticated midcentury influence.
Your finish should complement the room rather than compete with everything around it. Look at your flooring and existing furniture before committing to a color.
Before cutting your materials, consider how much waste the project might generate. Careful measurements can help you make better use of each panel, while proper cabinetmaking waste disposal helps you manage leftover wood scraps and finishing materials once the work wraps up.
4. Cable Management Deserves Attention Before Installation
You can build the most attractive floating console imaginable, but a bunch of tangled cables hanging underneath will ruin the effect.
Before installing anything, plan where your television’s power cable and other connections need to run. Your layout should accommodate your equipment without forcing cords into awkward positions.
Cable openings at the back of the cabinet can provide access to nearby outlets. You can also use surface-mounted cable raceways to conceal wiring along the wall.
However, don’t run ordinary television power cords through wall cavities. Electrical codes restrict concealed flexible power cords, and in-wall installations require appropriate wiring methods.
If you want hidden electrical connections, hire a licensed electrician to install suitable outlets. That investment can give your entertainment area a cleaner appearance without compromising electrical safety.
Ventilation deserves attention, too. Gaming consoles and streaming equipment generate heat, especially inside enclosed cabinets.
Leave appropriate airflow around your devices according to their manufacturers’ recommendations. A beautiful cabinet loses its appeal when your equipment overheats during movie night.
5. Small Design Decisions Make the Console Feel Custom
Once you’ve handled the structural details, you can focus on making your console look like furniture that belongs in your space.
Handleless cabinet doors create a clean, modern look, while discreet pulls make everyday access easier without adding visual clutter. Soft-close hinges also give the cabinet a more polished feel.
If you’re planning a few DIY upgrades for a more stylish living space, your floating console makes a great starting point. Match its finish to your existing furniture or introduce a contrasting wood tone that gives the room a little more personality.
Consider how frequently you’ll access the equipment inside. Open shelving provides convenient access, while closed compartments conceal accessories that might otherwise make the room look messy.
Lighting offers another opportunity to personalize the design. A carefully positioned LED strip beneath the cabinet can create a subtle glow that emphasizes its floating appearance.
Choose lighting with the right brightness, and avoid placing exposed strips where they’ll create distracting reflections on your television.
Finally, don’t rush the finishing work. Smooth edges and consistent door gaps make an enormous difference when you view the cabinet from across the room.
Conclusion
Building a floating TV console lets you create something that fits your space instead of settling for another oversized entertainment center.
Among the most useful things to know before building a floating TV console, proper wall support and thoughtful proportions deserve particular attention. Get those details right, and you’ll have a stronger foundation for the design choices that follow.
Take your time with measurements, respect the mounting requirements, and pay attention to the finishing details. Your living room can look sharper without giving up the floor space you already enjoy.